INSERTING AND REMOVING THE BOLT
INSERTING THE BOLT—
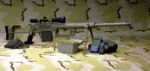
The Model 52 rifle comes packaged with the bolt removed from the rifle. It is necessary to insert the bolt into the receiver.
WARNING: REMOVE THE MAGAZINE AND MAKE SURE THE RIFLE IS FULLY UNLOADED BEFORE PROCEEDING.
To insert the bolt the safety must be placed in the "off safe"position.
1. The front and rear portions of the bolt must be aligned properly before it can be inserted. The bolt handle (and connected locking surface) can rotate with respect to the bolt body itself. If not already in alignment the parts must be realigned. To do this:
a)Take the end of the bolt body in one hand and the bolt handle in the other.
b)Twist the handle to align the top and bottom pointers on the shroud with the grooves cut in the bolt.


The top groove is on the polished portion of the top lug (see Figure 5). The bottom groove is on the rear of the bottom lug.
Align the end of the bolt in the rear opening of t receiver as shown (see Figure 6).
While pulling the trigger, push the bolt forward and shove it in the receiver, past the point where it stopped by the sear (see Figure 7). This may take a little force, but not too much. Optional: The sear c be depressed with a screwdriver for easier insertion (see Figure 8 ). This makes it much easier to insert t bolt.
4. Release the trigger and rotate the bolt handle down to lock it.
CAUTION: The chamber should be empty — if there is a round in the chamber, the rifle can be fin if the trigger is pulled.
WPM
5. Return the safety to the "On Safe" position. The rifle is now assembled and may be operated normally
REMOVING THE BOLT—
BEFORE REMOVING THE BOLT FULLY UNLOAD YOUR RIFLE: REMOVE THE MAGAZINE FROM THE RIFLE AND OPEN THE BOLT. VISUALLY ASSURE THAT THE CHAMBER IS EMPTY.
The firing mechanism must be uncocked before the bolt can be removed. With the rifle fully unload ed and pointed in a safe direction, close the bolt, then uncock the bolt by dry firing the rifle.
With the bolt now uncocked, insert your finger behind the trigger and push it forward as shown (Figure 9). You must push the trigger before you open the bolt or the bolt will not release.